톰캣서버 연결
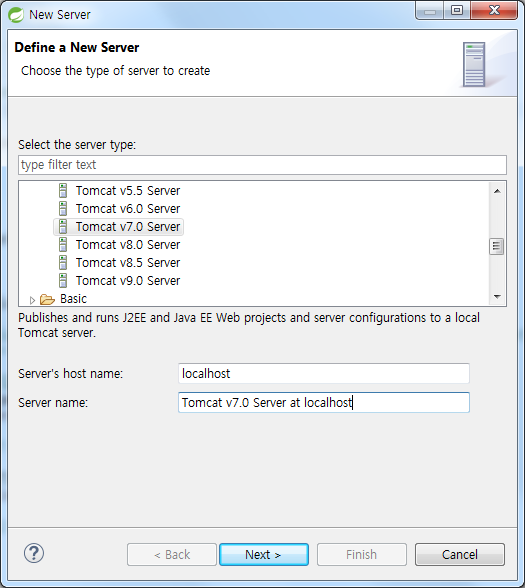
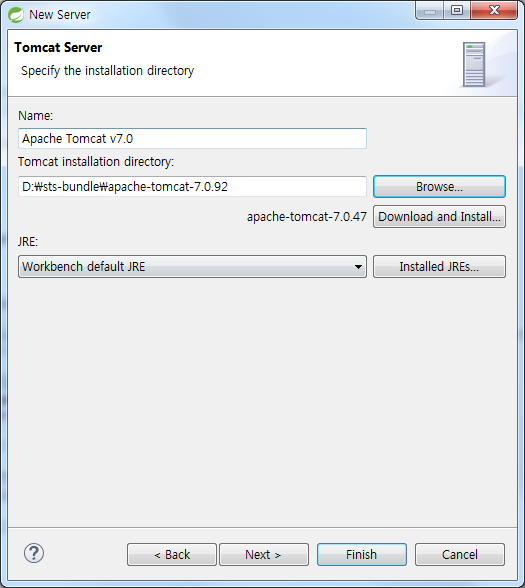
1. server 추가
○ 자신의 톰캣서버와 맞는 버전 선택
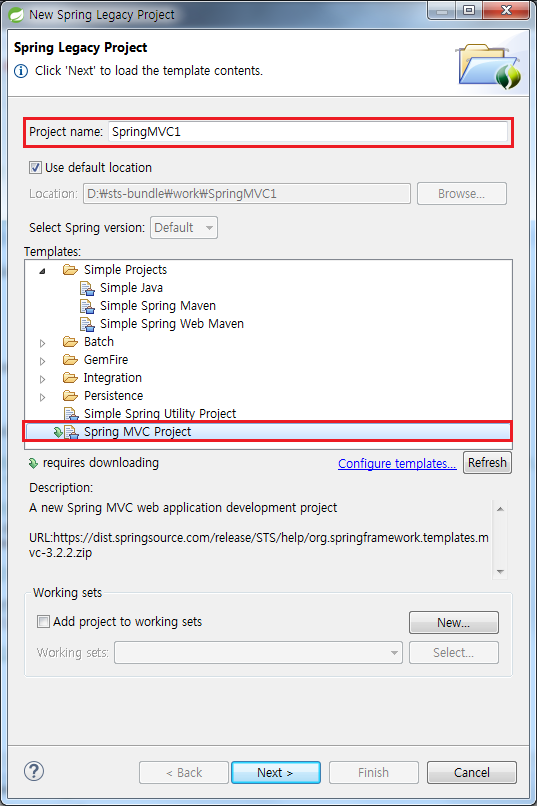
2. 프로젝트 생성
○ new > Spring Legacy Project
○ 패키지 이름 : com.exe.springmvc
3. 기본 패키지
○ 보안을 위해 모든 파일은 WEB-INF풀더에 넣음
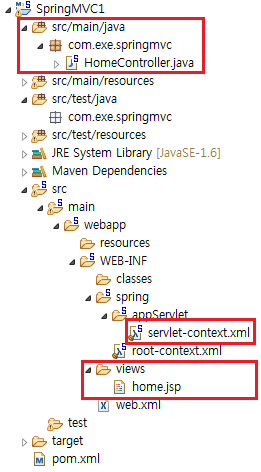
○ views풀더 : jsp파일을 넣음
- views > 풀더 > jsp파일
○ servlet-context.xml : app-context.xml와 같은 역할
○ resources풀더 : css와 javaxcript를 넣어두는 풀더
4. 기본 파일 설명
○ web.xml
<?xml version="1.0" encoding="UTF-8"?> <web-app version="2.5" xmlns="http://java.sun.com/xml/ns/javaee" xmlns:xsi="http://www.w3.org/2001/XMLSchema-instance" xsi:schemaLocation="http://java.sun.com/xml/ns/javaee https://java.sun.com/xml/ns/javaee/web-app_2_5.xsd"> <!-- The definition of the Root Spring Container shared by all Servlets and Filters --> <context-param> <param-name>contextConfigLocation</param-name> <param-value>/WEB-INF/spring/root-context.xml</param-value> </context-param>
<!-- Creates the Spring Container shared by all Servlets and Filters --> <listener> <!-- ContextLoaderListener : 스프링의 환결설정 파일을 무조건 읽는다 --> <!-- GenericXmlApplicationContext context = new GenericXmlApplicationContext("app-context.xml"); 이 역할 --> <listener-class>org.springframework.web.context.ContextLoaderListener</listener-class> </listener> <!-- Processes application requests --> <!-- 스프링의 객체 생성 --> <servlet> <servlet-name>appServlet</servlet-name> <servlet-class>org.springframework.web.servlet.DispatcherServlet</servlet-class> <init-param> <param-name>contextConfigLocation</param-name> <!-- servlet-context.xml : bean 객체를 생성하는 xml파일 --> <param-value>/WEB-INF/spring/appServlet/servlet-context.xml</param-value> </init-param> <!-- 스프링이 1순위 --> <load-on-startup>1</load-on-startup> </servlet>
<servlet-mapping> <servlet-name>appServlet</servlet-name> <url-pattern>/</url-pattern> </servlet-mapping> </web-app> |
○ HomeController.java
package com.exe.springmvc; //컨트롤러 생성 @Controller public class HomeController {
@RequestMapping(value = "/", method = RequestMethod.GET) public String home(Locale locale, Model model) {
Date date = new Date(); DateFormat dateFormat = DateFormat.getDateTimeInstance(DateFormat.LONG, DateFormat.LONG, locale);
String formattedDate = dateFormat.format(date);
model.addAttribute("serverTime", formattedDate );
//home.jsp로 가라 return "home"; }
@RequestMapping(value="/hello.action") public String getHello() {
return "hello"; }
} |

5. 주소 확인
○프로젝트 우클릭 > properties > Web Project Settings
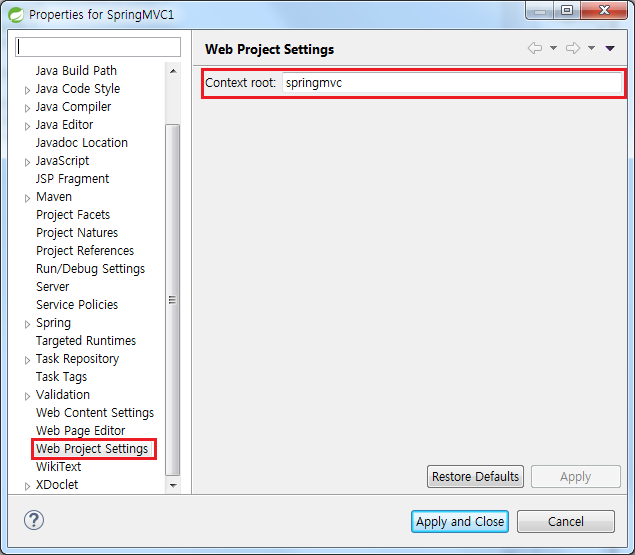
○ HomeController.java 와 home.jsp는 한 쌍

'STUDY > SPRING' 카테고리의 다른 글
| 스프링(3.0) DTO사용, 한글처리, ModelAndView (0) | 2019.04.16 |
|---|---|
| 스프링(3.0) 간단한 웹 예제 (0) | 2019.04.15 |
| 스프링(3.0) 의존성 주입 (0) | 2019.04.15 |
| 스프링(3.0) 예제 (0) | 2019.04.15 |
| 스프링(3.0) 프로젝트 생성 (0) | 2019.04.15 |


댓글